In this episode of Plants to Dye For - Season 2, we're dyeing with a commercial ground madder root. Madder is a flowering plant in the coffee family, Rubiaceae. It grows throughout Asia, Europe, and Africa, and color is extracted from its roots. Madder is complex, containing about 15 compounds, including the munjistin, alizarin, and purpurin dye molecules. By tweaking mordants, additives, and the pH of the dye bath, you can produce a wide range of colors from reds, to yellows, oranges, purples, and browns. For this project, we're using Rubia cordifolia, the source of the famous reds found in Indian chintz and painted cottons (including the ubiquitous bandana of the wild, wild west).
I purchased ground madder root from Maiwa Textile School, located in Vancouver Canada, so did not extract the color myself. Maiwa recommends using 35 - 100% WOF for ground madder root. For this project we're using 50% WOF, or 250 grams for a medium red color. Madder works best in hard water. To push up the pH, you can add 1 teaspoon of Calcium carbonate per pound of fabric, using ground chalk, antacid tablets, soda ash, household ammonia, or wood ash water. Madder is sensitive to temperature, so the dye bath should be kept between 140 and 160º F. If you boil the dye bath, the higher temperature destroys the red pigment, resulting in shades of brown.
The Weight of Fabric (WOF) for this project is 498 grams (or just over a pound), and includes five dish towels and one T-shirt. We're using fabric that has been scoured, mordanted in oak gallnut, and further mordanted in an alum and soda ash bath. For details, see Scouring your Fabric (Soaking Method), Mordanting Fabric (Oak Gallnut), and Mordanting Fabric (Alum Brightener). Preparing fabric for dyeing is so important for the outcome.
Outdoor studio and basic equipment
For this project you'll need a well-ventilated workspace. I used our patio, which is located in the shade of an oak tree and great for summer dyeing. You’ll need a soaking pot, a dye pot, a heat source, and a candy thermometer to ensure the dye bath is kept at a consistent temperature. For safety, wear a face mask when measuring and stirring the powdered dye, so you don't inhale or ingest small particles.
Use a candy thermometer to monitor dye bath temperature
The basic process, based on Maiwa online instructions (Ctrl+F and search for Madder):
Presoak the prepared fabric.
Mix the dye in water, and heat to 140º for one hour.
Add fabric, and heat for 1-2 hours, maintaining the temperature between 140 and 160º F.
Rinse and air dry the fabric.
Presoak prepared fabric before dyeing
Add water to the soaking pot, and presoak the prepared fabric for at least an hour (or overnight). This helps ensure that the fiber soaks up the dye evenly. Stir occasionally.
Add madder to the dye pot and stir until incorporated
After presoaking the fabric, add two gallons of water to the dye pot, and stir in madder until mixed. This process can take a while because of the quantity of dye stuff. In retrospect, it may have been easier to incorporate the dye into a small bowl of water, and then add the concentrate to the dye pot. Bring the temperature to about 140º F (60ºC), and hold for an hour.
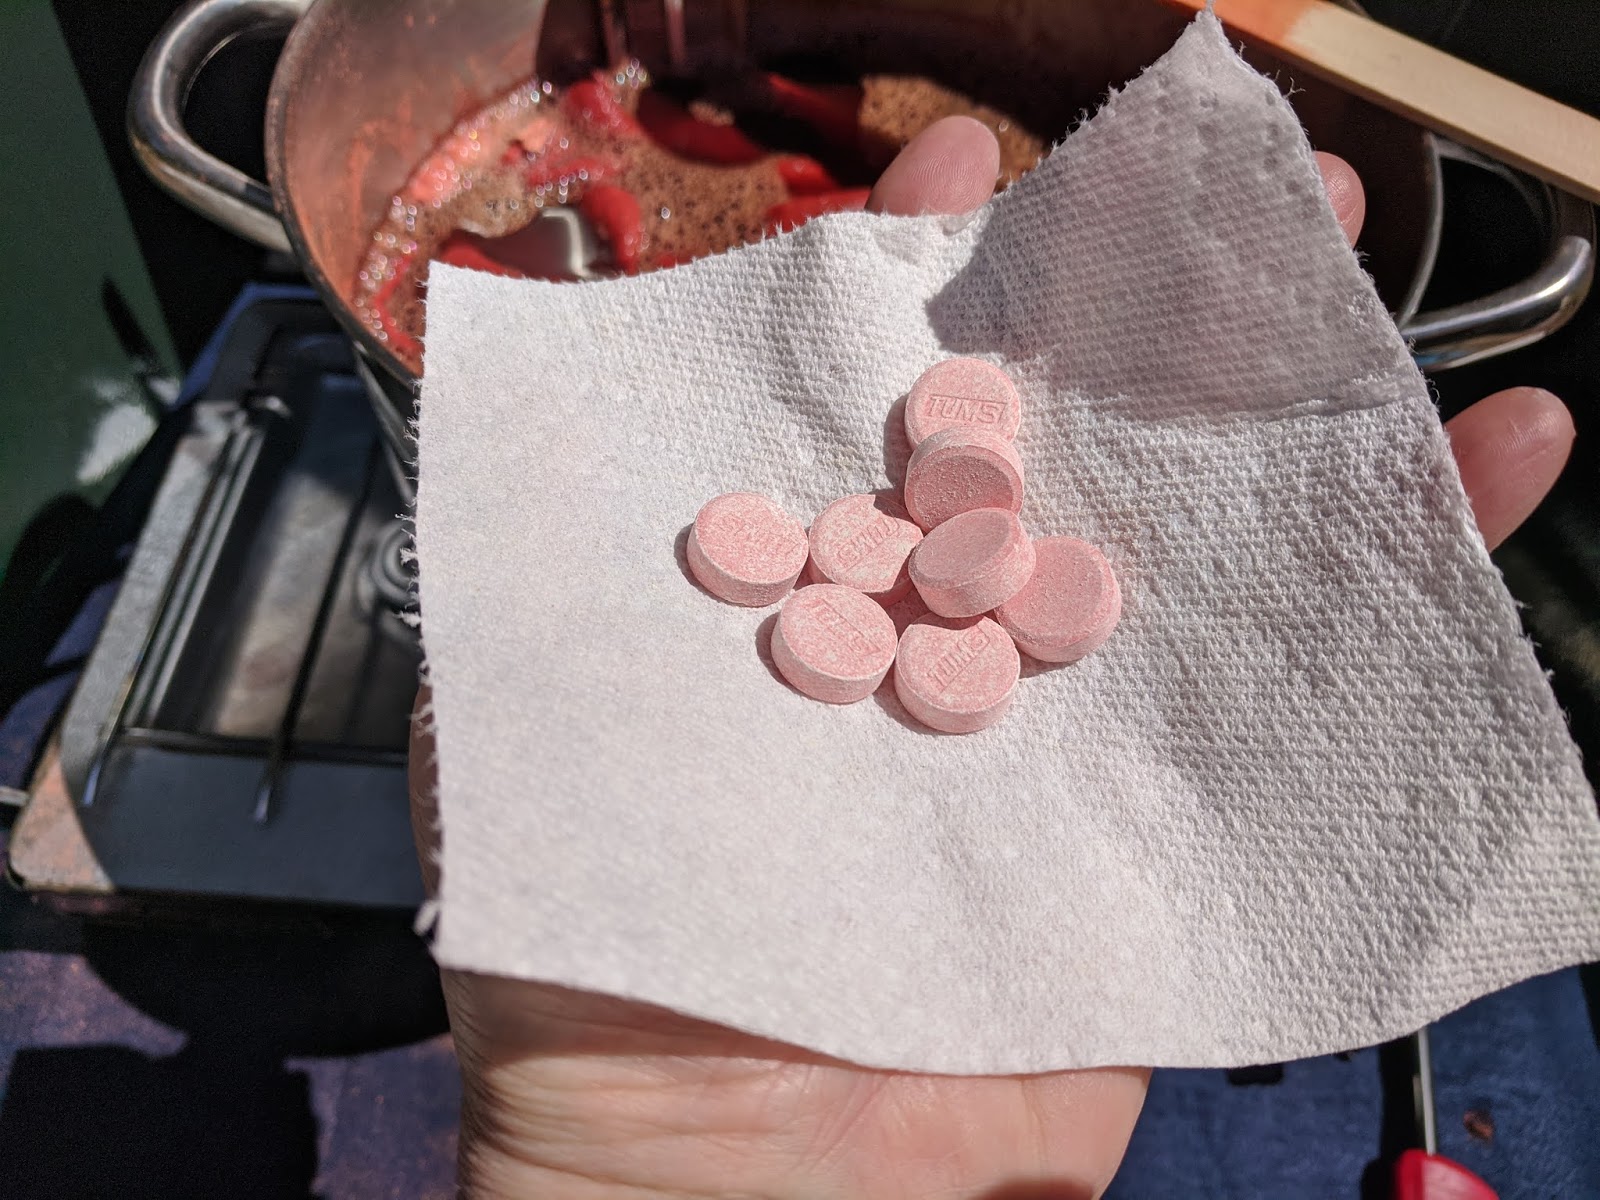
Add fabric and any modifiers to the dye bath (these antacids change the pH)
Add fabric to the dye pot. At this time, you can also add your modifiers to influence the color outcome. To increase water hardness and influence the dye towards bluish-red instead of orangish-red, I added eight antacid tablets (I had Tums on hand); four tablets would have been sufficient. Continue cooking the fabric for another 1 - 2 hours, stirring and rotating the fabric periodically to distribute the dye evenly.
Simmer the dye bath, keeping the temperature within range
The left burner provides heat, but offsetting the pot helps control the temperature
Maintain the temperature between 140 - 160º F. to avoid bringing the the dye bath to a boil. I find it difficult to regulate temperature with my heat source (it's either on or off, regardless of the setting). But, I can control the temperature better using indirect heat (offsetting the pot from the burner), and adding water periodically to cool down the pot.
Let the dye bath cool
Turn off the heat and let the pan cool, leaving the fabric in the dye bath for as long as you want. I covered the pot with aluminum foil, and soaked the fabric overnight for saturated color.
Rinse fabric until the water runs clear
Squeeze out water
When ready, squeeze out excess dye from the fabric back into the dye bath (don’t toss the dye)! Rinse the fabric in cool water until the water runs clear. Here in the San Francisco Bay Area, we are very water-conscious, especially in drought years. I try to conserve water by agitating the fabric in a succession of water baths, rather than letting the tap water flow. With most natural dyes, depending on the modifiers used, you can reuse the rinse water in the garden. Run the fabric through the washing machine rinse/spin cycle a couple of times.
Use the rinse/spin cycle a couple of times
Air dry the fabric
Hang the fabric to air dry. In a couple of weeks, after the dye has had time to set, wash the fabric in Synthrapol, or other neutral detergent, to remove excess pigment that has not bonded. You can include a light-colored piece of fabric in the wash cycle to confirm that the dye has set.
Test cloth shows that the dye has set
A cotton dish towel (left) and T-shirt (right) dyed in the same madder bath
Preserve the dye in sealed containers to use later. Be sure to label the jars so you know what you have. According to Maiwa, the madder dye bath can be reused two or three times, producing lighter shades each time. Madder can also be used in combination with other dyes, such as cochineal or walnut hulls, to produce additional colors.


No comments:
Post a Comment