For our next home dyeing project, we're using yellow onion skins. The skins produce beautiful shades of tan and brown. I'm dyeing more of our white cotton dish towels, which have been scoured using Synthrapol and soda ash, as described in Scouring your Fabric. Onions are tannin-rich so do not need a mordant, but I'm adding alum (potassium aluminum sulfate) as a brightener.
I used our patio as an outdoor studio, but this project could be done in the kitchen using the hood fan for ventilation. Still, I prefer working outdoors, and keeping the strong smell of onion from permeating the kitchen!
Outdoor studio
I collected about 150 grams (or 5 ounces) of onion skins over several months. To speed things up, you can ask your family and friends to save onion skins for you, and scavenge for loose skins in the onion bin whenever you buy onions at the market.
Onion skins
I dyed 231 grams (or 8 ounces) of fabric using 150 grams of skins, which is equivalent to 65% Weight of Fabric (WOF):
150g onion skins = 65% WOF
231g fabric 100% WOF
But this is just one recipe. Other recipes call for 30% WOF, others for 100%, and still others for the skins of 10 onions. Use what you have and experiment!
Soak the fabric in hot water to ensure even dyeing
If you plan to dye right away, soak your prepared fabric in hot water for at least an hour (or overnight). This helps ensure the fiber soaks up the dye evenly.
Simmer onion skins in water to extract the pigment
Strain the dye through cheesecloth
Extracted dye
To extract the dye, I added the onion skins to boiling water, reduced the heat, and simmered for 30 minutes to an hour. I strained the mixture through cheesecloth and returned the dye to the pan.
Return the dye to the pan and add alum
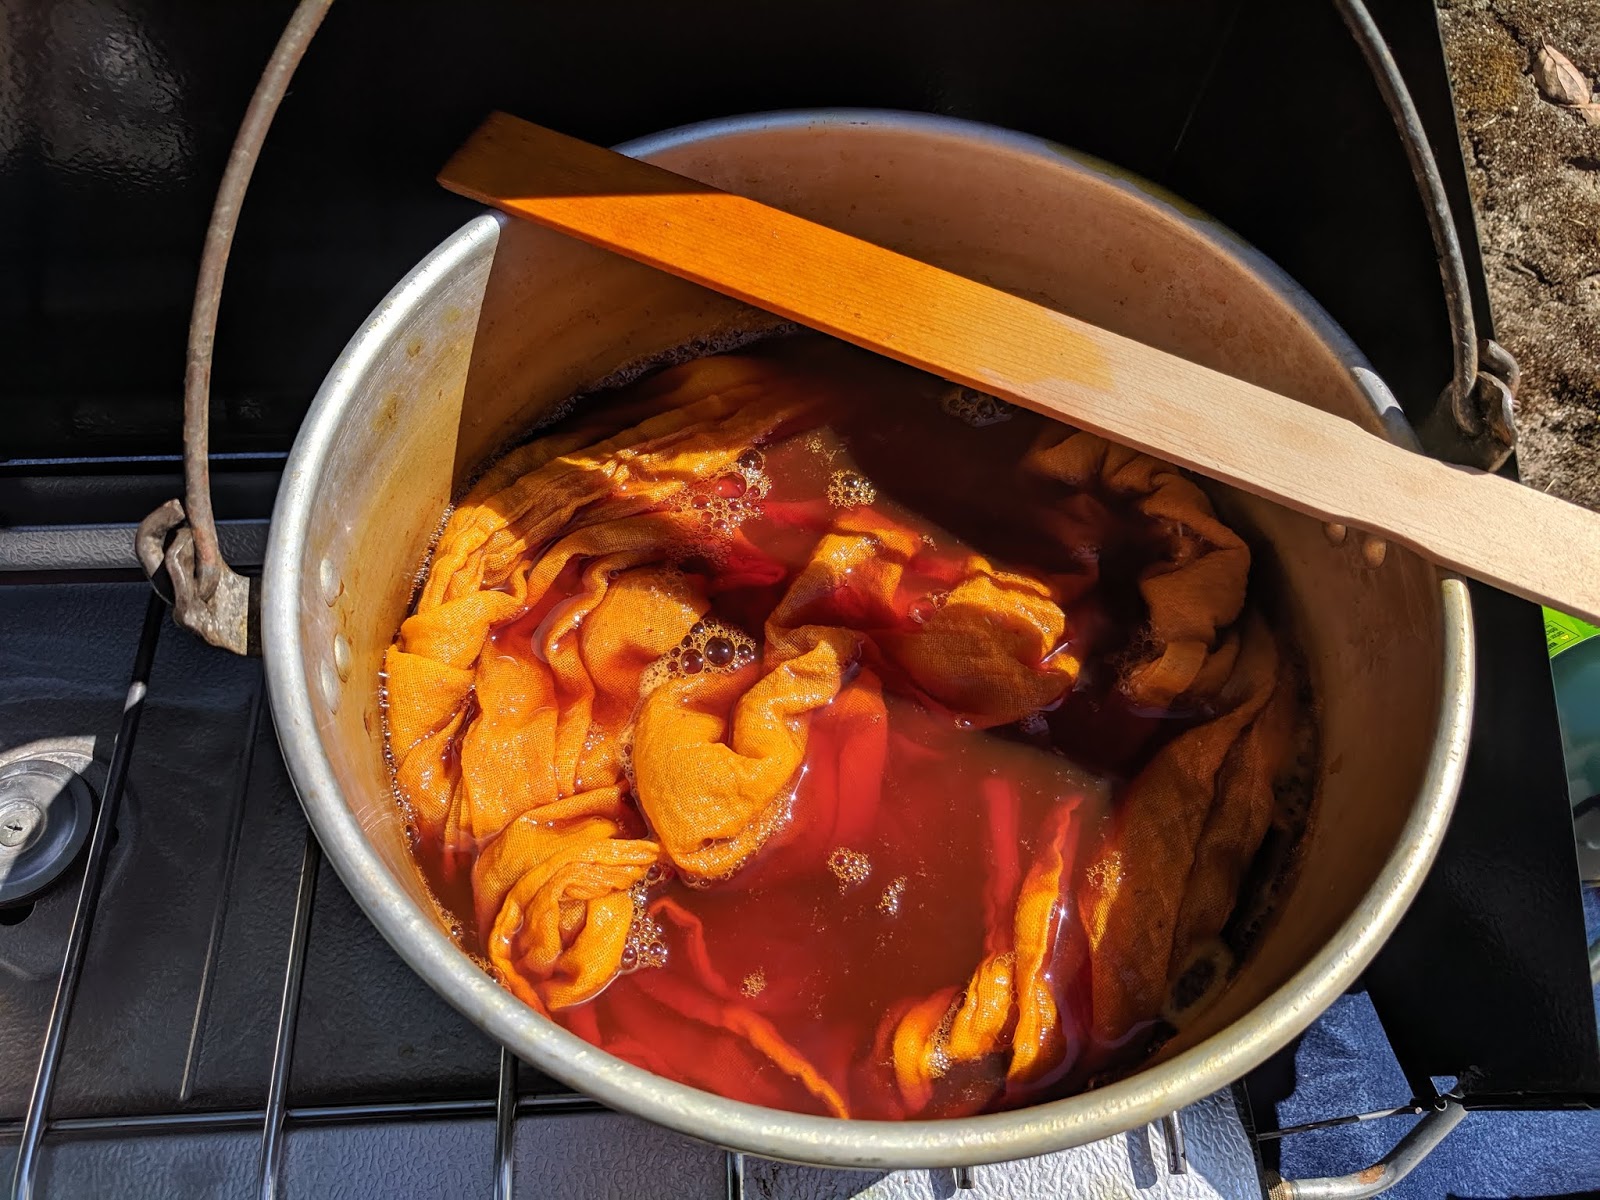
Simmer the fabric in the dye bath for an hour or more
I brought the dye bath back to a boil, and stirred in one tablespoon of alum. I added three dish towels, reduced the heat, and let simmer for a couple of hours. I soaked the towels overnight to deepen the color.
Rinse the fabric in cold water
Squeeze out excess dye and rinse to water runs clear
Air dry the dish towels
The next day I rinsed the towels until the water ran clear. I hung the towels to air dry, then ran them through the washing machine to set the color, then air dried again. I am really pleased with the rich orangey-brown color, and wonder how colorfast it will be. I'm a little leery after the disappointing results of the cabbage experience (see Dye Project: Red Cabbage)!
Preserve the dye for future projects
I preserved the excess dye in glass jars to use in future projects, and labeled them so I wouldn't forget. The dye color may be less intense, but it is still usable, either for a lighter shade or mixed with another color. This provides another opportunity to experiment!
Container gardens thrive this time of year in the San Francisco Bay Area. It's hard to beat a container or group of containers of bright summer annuals in the dead heat of summer. With daily watering, a little deadheading, and fertilizing periodically, you can keep your containers fresh and blooming for weeks!
Containers in the early morning
I planted these petunias a month ago in preparation for my sister's visit to the Bay Area (see Two Sisters, 48 Hours). Supporting the white and pink petunias are purple salvias, white alyssum, and an unnamed purple "Annual" (the milky fluid it produces when deadheaded reminds me of milkweed).
Petunias, salvia and alyssum
The variety of pots provides extra interest, including several lovely terracotta pots with white patina, a blue glazed ceramic pot, and a deep green plastic pot.
The simplicity of white flowers in a terracotta pot
I enjoy the morning ritual of watering, deadheading, and looking for tiny green petunia budworms that love to eat their way through the petals. Nature!
I find it fascinating to watch people work. Even folks doing roughly the same work often come up with innovative processes and tools to complete their tasks! Watching someone else work can foster new ideas and improvements that can benefit everyone. Over the next several months we will visit several dye artist studios, via the magic of YouTube, to check out their workshops, see how artisans carry out their tasks, and learn some of their dye secrets.
Our first visit is to Japanese dye artist, Sachio Yoshioka, in the video "In Search of Forgotten Colours". Yoshioka is a fifth generation dyer from Kyoto. In 1988 he took over the family business and switched from synthetic dyeing to dyeing with plants and other natural material. The video was produced by NHK Enterprises, Inc. and Art True Film, and published on the Victoria and Albert Museum website on June 6, 2018 as part of an exhibition. The film is a compilation of four documentary segments.
A couple of items especially caught my interest. One was learning about the dye extraction processes used for three plants: My Example
Color
Plant
Description
Yellow
Kariyasu (Miscanthus tinctorius)
Stems
Red
Beni Red (Carthamum tinctorius)
Petals
Violet
Murasaki Purple, or Purple Gromwell
(Lithospermum erythrorhizam)
Roots
Kariyasu (3:13) – the stems are steeped in water to produce a pale yellow dye for fabric.
Beni Red (5:26) – the safflower flower petals are harvested in summer and dried, and then processed in mid-winter when the well water is at its coldest. The processing is long and complicated. An alkali made from straw ash is used to release the red colorant, followed by adding vinegar. Strips of linen soak up the colorant, and the strips are added to another alkali bath. An extract of a dried plum causes the colorant to precipitate onto a piece of silk. Finally the colorant gains the consistency of fine mud, is diluted with water, and then painted onto paper for use in ceremonies.
Murasaki Purple, or Purple Gromwell (13:30) – the roots are harvested and processed to produce an intense purple dye for fabric. Yoshioka researched ancient texts, including the Engishiki (or "Procedures of the Engi Era", 927), to learn how to achieve the dye. The plant is an endangered species, so Yoshioka works with farmers in Taketa to revive its cultivation.
The chemistry and complexity of some of these processes must have taken centuries to develop and perfect. Imagine the trial and error required to discover and refine the processes used to produce such beautiful results!
The other especially interesting item was seeing Yoshioka's workshop, situated in the green outskirts of Fushimi, southern Kyoto, with its source of local well water and all its equipment. Part of the workshop is outdoors for great ventilation, but covered for shelter. Gas burners provide a heat source. The artisans use a variety of plastic and stainless steel tubs and containers, as well as specialized vats for extracting dyes, and dyeing and rinsing fabric. Some vats include run off valves to release dye by-products.
I loved seeing the tools used to macerate plant material in preparation for extraction, including the large stone mortar and massive wooden mallet wielded by Denji Fukuda, master dyer. It's also fascinating to see how much the artisans use their hands in some of the processes – breaking up plant dye source, stirring the dye pot, moving fabric through dye and water vats, hanging the fabric to air dry. And the colors produced using plant material are amazing!
I hope you enjoyed this peek into Yoshioka's atelier. I enjoy working in my outdoor patio studio, but seeing his workshop gives me some ideas for small-scale improvements!
Flowers (best for wool, with alum)
Flower stamens
Flowers
Plant
Leaves
Flowers
Roots
Nuts
Orange
Sassafras tree
Bark
Reds
American pokeweed (Phytolacca americana)
Bloodroot (Sanguinaria canadensis)
Alder
Spruce pine
Indian Mulberry (Morinda citrfaolia)
Indian Madder (Rubia cordata, now Rubia cordifolia)
Ficus (Ficus tinctoria) + Geiger Tree (Cordia sebestena)
Ripe berries (not color fast)
Fresh roots
Bark
Root
Root
Fruit + Flower