Another fine resource for the city-dwelling homesteader is Make the Bread, Buy the Butter by Jennifer Reese (Free Press, New York, 2011). Ms. Reese is a professional journalist and home cook. After being laid off from her job in 2008, she was concerned about living frugally, and assumed that making everything from scratch would help. Or would it? This kicked off an ongoing project to find the sweet spot between buying and making. And she tried it all - raising chickens, making cheese, baking bread, canning, and preserving.
The book includes twenty chapters, with names like Breads and Spreads, From Beak to Tail, Cured Meats, Goats, Canning, and Having People Over. In each chapter, Reese reviews several items (such as bread, French fries or applesauce), and then recommends whether to make or buy the item. Her criteria are flavor, hassle, and cost. She typically has strong make or buy opinions, but sometimes recommends doing both. Other times she recommends getting the item from a deli or food truck instead; or even making it once for the experience, and buying it thereafter. In the backmatter, Reese summarizes her experience (hint: it's OK to buy), shares a recipe from her mother (Skippy's Apricot Cake), and provides resources for cheesemaking, meat curing, and baking supplies.
I really enjoyed Reese's warm and funny writing style, and her thorough. hands-on approach to research. Not only does she experiment in the kitchen, but she turns their urban lot into small farm raising chickens, ducks, and goats. I especially enjoyed her thoughts on entertaining in Having People Over, and agree with her take in Breakfasts that you should make yogurt and not buy it (see Homesteading: Making Yogurt). As planned, I made her butterscotch pudding recipe in Desserts, and agree with Reese's assessment - it is definitely a recipe to make if you have a few extra minutes to spare!
The Bringing Back the Natives garden tour is back for 2022, and this time with both a virtual and in-person formats. Last weekend the virtual garden tours took place, via Zoom and YouTube. In a couple of weeks, the in-person garden tours will take place. This year I attended both virtual garden tours and may attend some of the in-person tours (first time ever)!
Doug Tallamy from University of Delaware gave the keynote address, based on his most recent book, The Nature of Oaks, which follows an oak tree through the calendar year. Doug is an advocate of planting keystone plants, which provide vital food sources and shelter for other species, and help define entire ecosystems. His favorite example is the oak tree, which hosts whole communities of birds, moths, butterflies, rodents, beetles, spiders, and more. Doug has spoken on aspects of this this topic over the last three years. It's very common to hear other presenters quote Tallamy or report how their landscaping practices have changed because of him (one person even tore out all their agapanthus after hearing Tallamy speak)!
Some of my favorite presentations include organizer Kathy Kramer's plant round up: "Ten Best Native Plants for Sunny Areas" and "Ten Best Native Plants for Shady Areas". And Al Kyte' retrospective on his 50-year old California native garden in Moraga, which is the subject of a six-video series called "Dimensions of Beauty". It's also fun to learn about new tools, like the Sun Surveyor app for tracking sunlight in your garden; native plant sources such as East Bay Wilds and Oaktown Nursery; and landscape designers.
Sun Surveyor app
Bee condo
How to prune manzanitas
It's not too late to sign up for the 2022 in-person garden tours (April 30 and May 1). Registration enables you to visit the gardens and see the recordings from the virtual garden tours. To learn more about the online agenda from last weekend, see Online Garden Tour agenda, 2022. To learn more about the in-person agenda in a couple of weeks, see View 2022 In-Person Tour Gardens. The tours are free, but donations are appreciated to offset costs. Hope to see you there!
Our theme this year is "homesteading in the city", where we celebrate making and doing for ourselves, with all the comforts of modern life. Today I'm roasting chicken in the oven, making broth in the slow cooker, and using the ingredients to create delicious, nutritious meals.
Roast chicken just out of the oven
Chicken is an affordable and flavorful protein source. It is versatile, and used throughout the world in many cuisines. Chicken can be served up in fancy presentations, or in everyday dishes.
We’ve had some chicken farmers in my own family history, both in Vermont back in the late 1800s and early 1900s, and in Southern California during the Depression. I remember well my Grandma Char's fried chicken for a crowd. She used a great technique of browning the chicken on the gas range top, and then finishing the cooking in the oven. We had some wonderful family parties eating fried chicken and all the fixings out on the lawn in the heat of the Southern California summer. Great times!
Family chicken farm in Vermont
One of my family’s favorite dishes is a simple roast chicken, with crispy flavorful skin, and tender juicy meat. I use the roasting technique described by Irma S. Rombauer in The Joy of Cooking:
Truss the chicken (you can fill the cavity loosely with vegetables for extra flavor). Oil or butter the skin and season with salt, pepper, and dried thyme.
Place the roasting pan in a preheated 450-degree oven, and cook uncovered for 15 minutes.
Reduce heat to 350 degrees and cook for an additional 20 minutes per pound.
Baste frequently with pan drippings, and tent with foil if needed.
Remove from the oven when juices run clear. Let the bird stand for about ten minutes, and then carve.
Serve with a salad, roasted vegetables, mashed potatoes and gravy, brown rice, or other tasty side dish.
Don’t throw away the carcass! Use it to make a rich, flavorful broth. If you can’t do this right away, freeze the bones in a “bone bag” until you’re ready.
Slow cooking bone broth
I follow these slow cooker steps from Emma Christensen in The Kitchn:
Place bones, vegetables, and bay leaf into the slow cooker. I typically use an onion, two large carrots, and two large celery stalks.
Cover the bones and vegetables with water.
Cook on low for 8 - to 24 hours.
Strain the broth through a sieve and cheesecloth into jars or containers.
Keep the broth in the refrigerator for up to a week, or in the freezer for up to three months.
Use for homemade soup, chicken-and-dumplings, gravy, or as a water substitute for cooking grains and rice.
Fast cooking bone broth
You can also make bone broth in the Instant Pot, as described by Melissa Clark in Dinner in an Instant. Either way is delicious.
Freeze some of the chicken for a speedy meal in the future
One of my “homesteading” tricks is to freeze some of the meat for future meals. Shred a cup or two to use in tacos, enchiladas, or hash. Or cube some to use for chicken pot pie, soup, or burritos. It’s wonderful to have this cache in the freezer, which I can turn into a tasty meal on short notice. There are so many ways to serve chicken - enjoy!
Chicken burritos, pot pie or parts (dibs on the dark meat!)
Learn More:
The Joy of Cooking, by Irma S. Rombauer and Marion Rombauer Becker. Bobbs-Merrill Company, New York, 1977, page 422 (Roast Chicken).
This year we're kicking off the dye season with more solar dyeing, this time with avocado pits and skin (kitchen scraps)! This ties in with our "homesteading in the city" theme, where we try to be resourceful, use what we have, and repurpose items where we can. We tried our first solar dyeing project last year (see Solar Dyeing with Calendula). We're finally ready to try more solar dyeing!
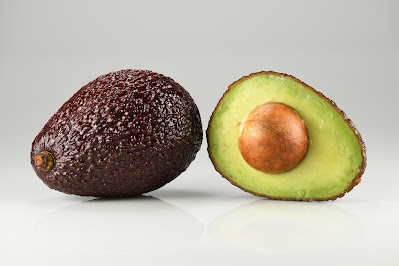
In this tutorial we are solar dyeing cotton fabric with avocado pits and skin. My research shows that the fruit yields lovely shades of pink or coral dye. Some dyers report that the color is slightly different when you dye with pits only or with the skin only. For this project, I’m mixing the two. Many dyers recommend the Hass avocado for good color (Persea americana ‘Hass’). ‘Hass’ is a hybrid tree, that was developed by a Southern California mail carrier and amateur horticulturist, Rudolph Hass.
Hass Avocado (Persea americana ‘Hass’) Photo Credit: Ivar Leidus
I followed the process documented by Caitlin French in Kissed by the Sun: The Art of Solar Dyeing, and information found in several other sources. I used three cotton dish towels. The Weight of Fabric was 7.75 ounces (231 grams). The fabric was scoured and mordanted, using a gallnut mordant. Two pieces were also treated in a bath of 15% WOF alum and 2% soda ash as a brightener. The other was not.
Frozen avocado pits and skin, collected over time.
I collected about 1.6 pounds of avocado pits and skin (726 grams), so, the WOF% is about 314%. I froze the avocado kitchen scraps until I was ready to dye. Ideally, clean the flesh from the pits and skin before freezing. I hadn’t noticed how much pink pigment there is in avocado skin and pits until this project.
Surprising pink pigment
Supplies (the yellowish tint you see in the fabric is from the gallnut mordant)
Supplies for dyeing include:
Large jar (with room for some movement)
A gallon of water (+ more as needed)
Prepared cotton fabric (scoured, gallnut mordant, and alum brightener)
Alum (2-3 teaspoons per 100 grams of fabric)
NOTE: For safety, use a face mask and rubber gloves.
Solar Dyeing
First, presoak the prepared fabric to ensure the mordants and natural dyes distribute more evenly, and then squeeze out excess water. Pour warm water into the jar, until it is about a third full. Stir in the alum. I used 6 teaspoons for 231 grams of fabric. Let the water cool and the alum dissolve thoroughly.
Layer fabric and avocado scraps, and fill with alum water
Add a layer of avocado scraps to the alum treated water. Then add the first piece of fabric. Add more avocado. Add the second piece of fabric, and repeat. Top with the rest of the avocado. With the stir stick, evenly distribute avocado scraps around the sides of the jar. Add water to cover the fabric and avocado. Let the water settle, and then top it off. Close the lid.
After three weeks (the fabric looks pink)
Leave the jar in a sunny spot, inside or out. You start to see the color appear after several hours. Check the fabric color daily, and agitate the jar slightly to distribute the dye. I soaked the fabric for three weeks. Once the fabric is the desired color, remove it from the jar and squeeze out excess liquid.
Rinse until the water runs clear
Air dry fabric
Rinse the fabric in cool water until the water runs clear. Run the fabric through the washing machines' rinse and spin cycles, using cold water. Let the fabric air dry. Two weeks later, wash the fabric in a pH neutral soap, like Synthrapol or Professional Textile Detergent, and hang to dry.
An interesting shade of butterscotch
Surprisingly, the resulting color looks more like butterscotch than pink or coral. Possibly the fabric was packed too tightly or remained too long in the dye? The unexpected outcomes are part of the adventure and fun of home dyeing. Note that the fabric piece that did not receive the extra alum brightening bath, ended up the same color as the two pieces that did.